HOW TO CREATE A YOUTUBE CHANNEL

Creating a YouTube channel using your Google account

1. Go to YouTube and sign in

Head over to YouTube.com and click ‘sign in’ in the top right corner of the page:

youtube-sign-in

Then log in using the Google Account you’d like your channel to be associated with:

google-account

2. Head over to your YouTube settings

In the top right corner of the screen, click on your profile icon and then the ‘Settings’ cog icon.

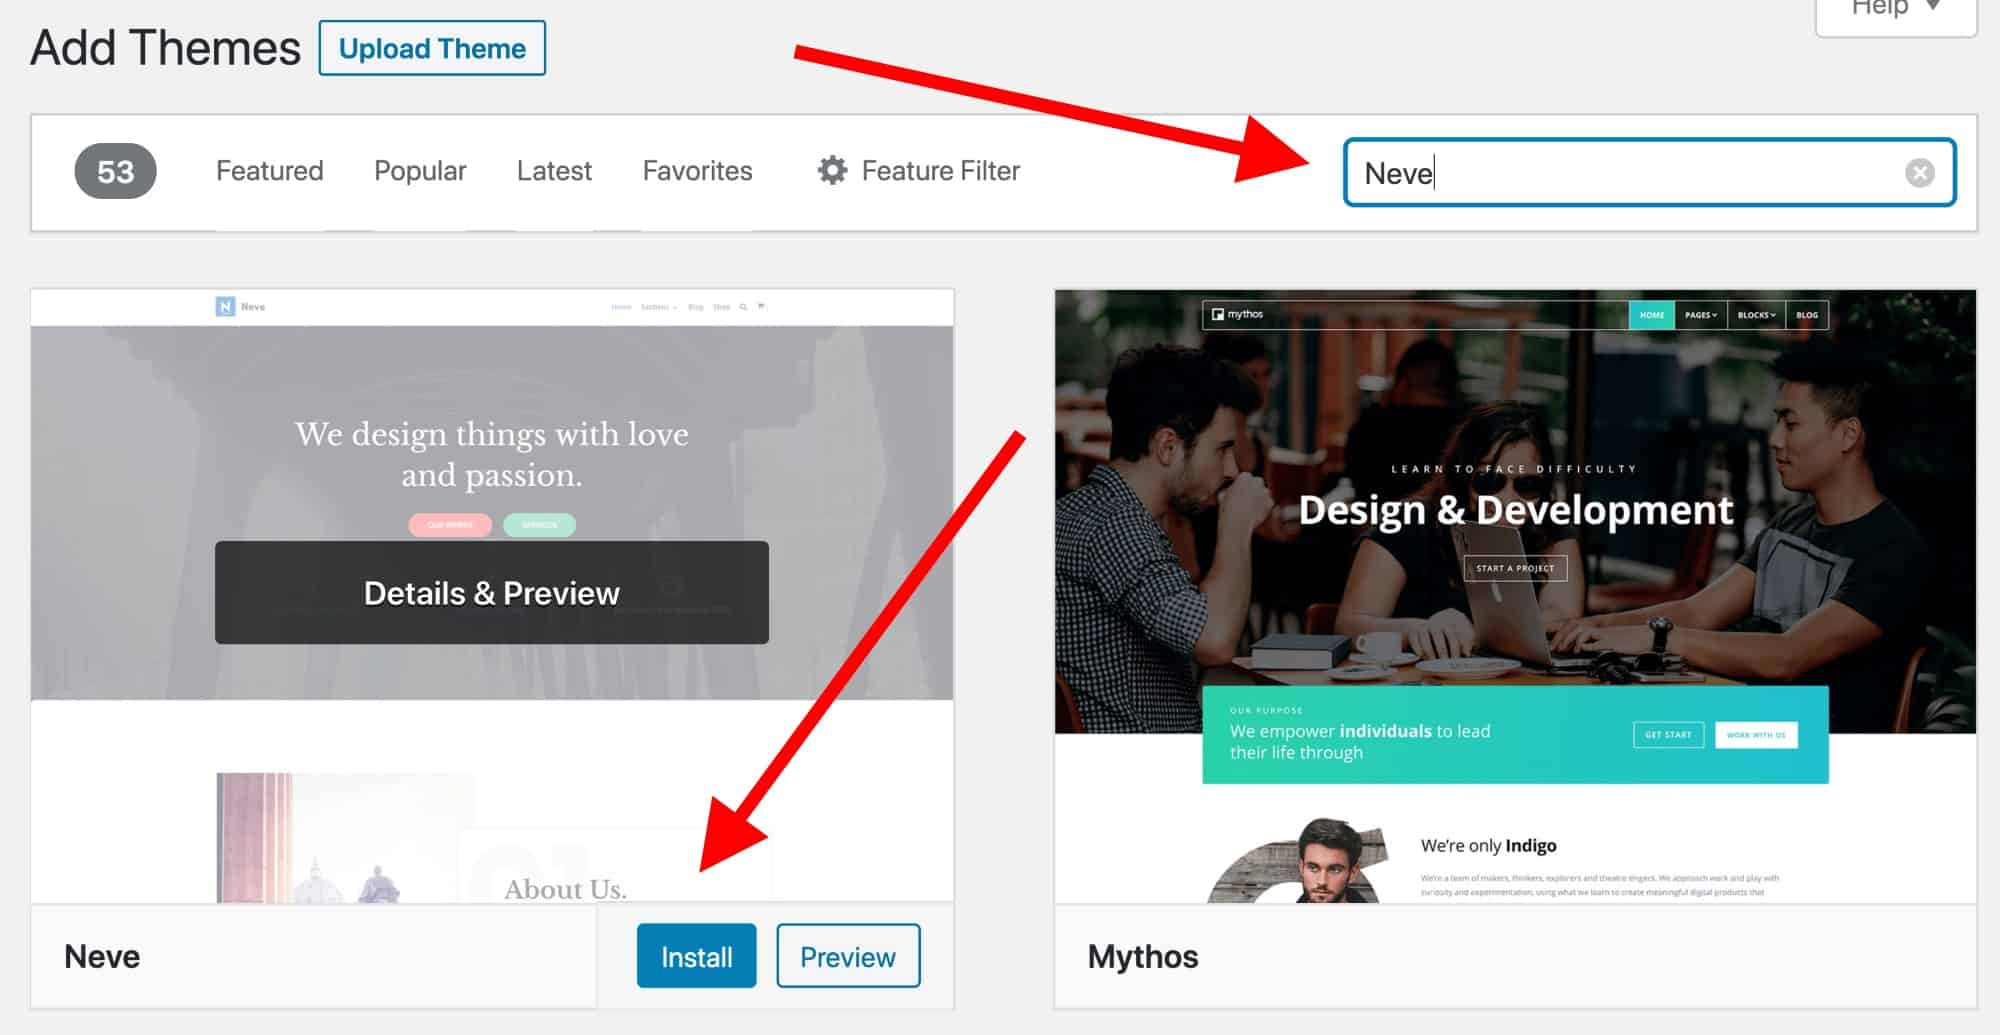
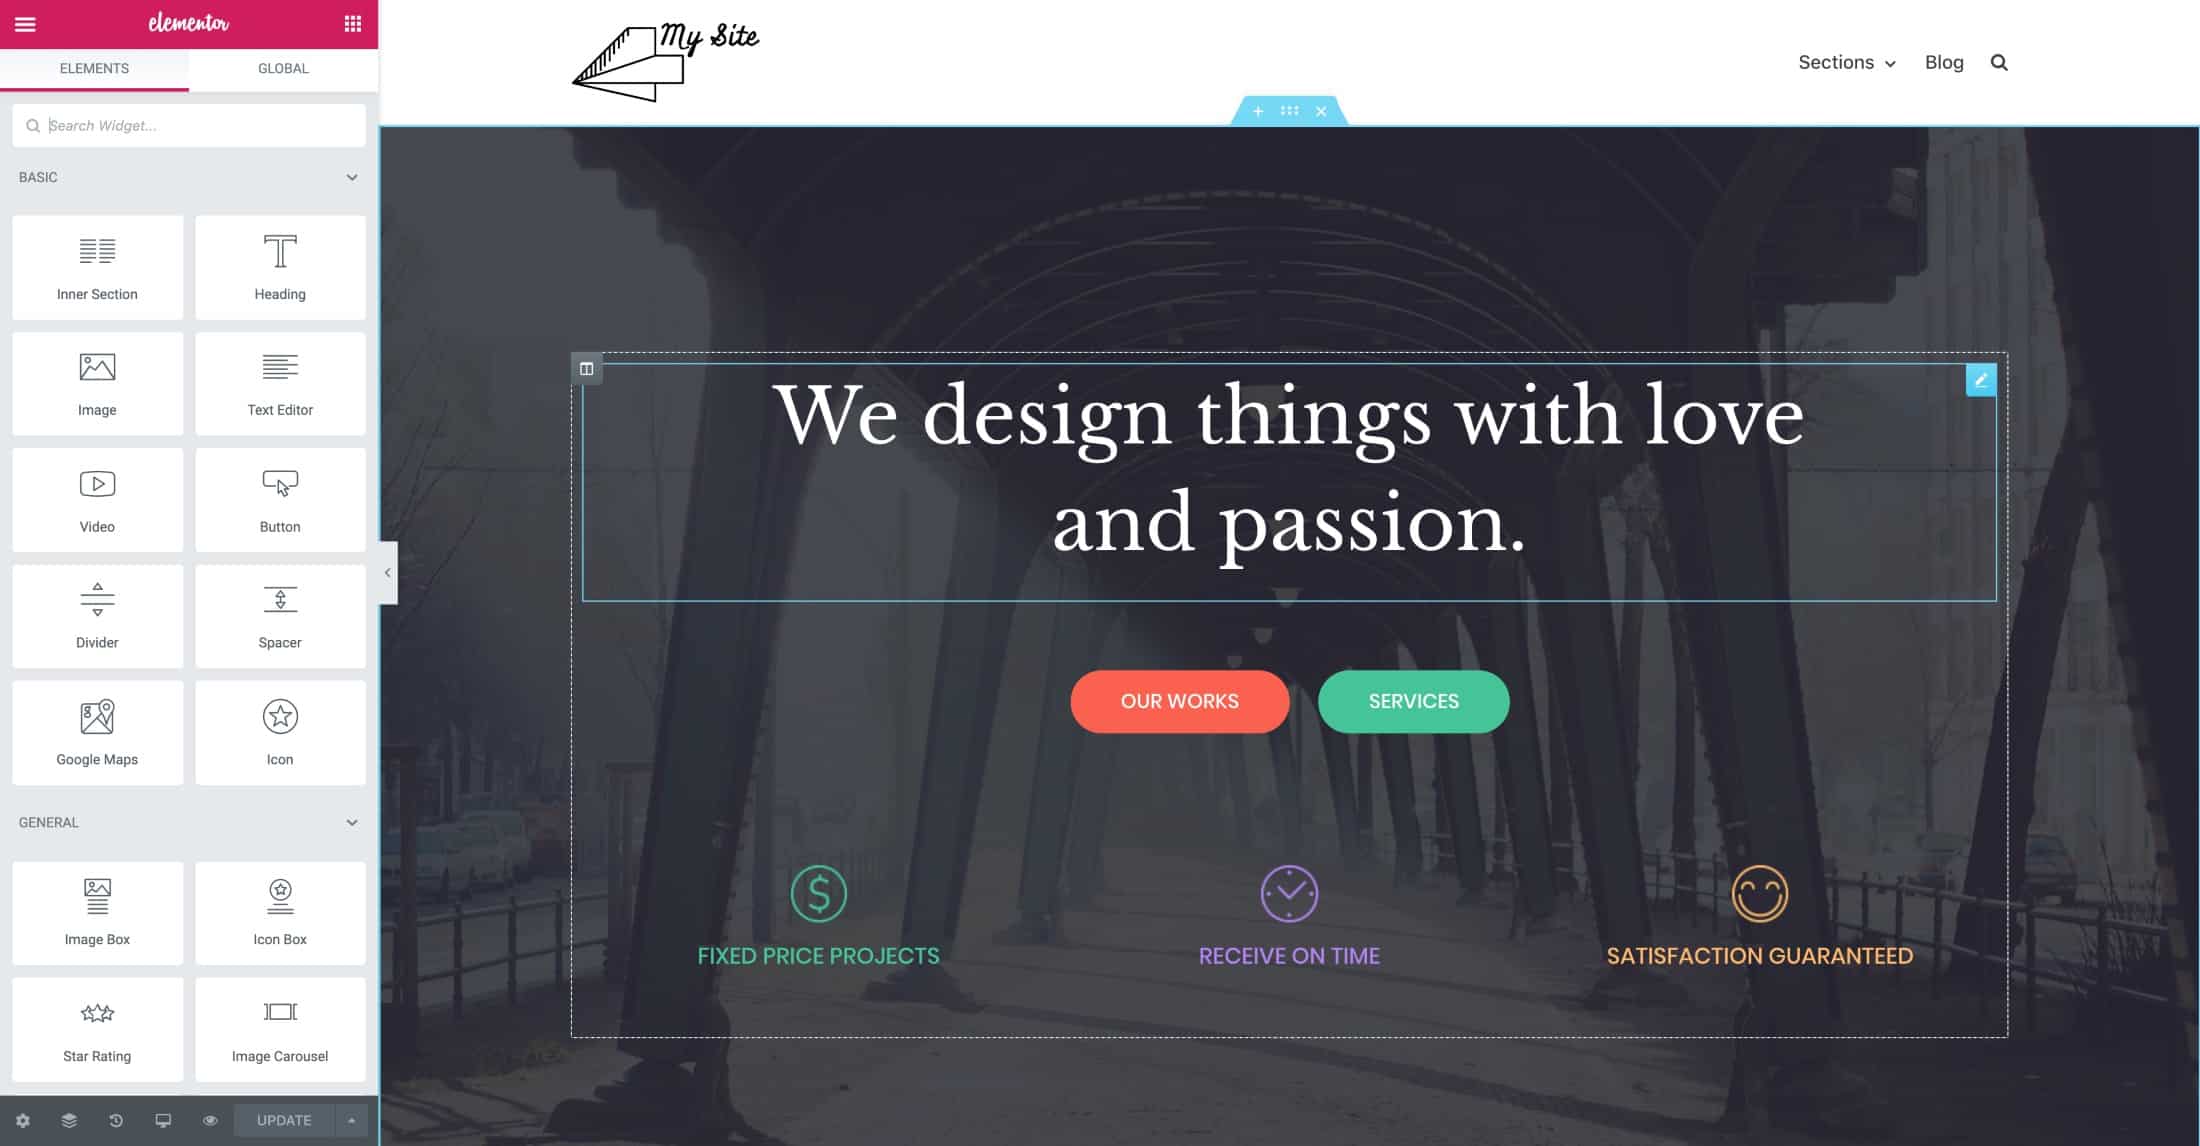
3. Create your channel

Under your settings, you’ll see the option to “Create a channel,” click on this link:

create-a-youtube-channel

Next, you’ll have the option to create a personal channel or a create a channel using a business or other name. For this example, we’ll choose the business option:

youtube-channel

Now, it’s time to name your channel and select a category. The channel options available include:

  • Product or Brand
  • Company Institution or Organization
  • Arts, Entertainment or Sports
  • Other
youtube-channel-name

Note: a new Google+ page will also be created for your brand. 

Congratulations! You’ve just created a new YouTube channel ?

youtube-channel-complete

Next, let’s fill out all the information and create some channel art to get your page looking awesome (click here to jump to the next section).

How to create a YouTube channel if you don’t already have a Google account

If you don’t already have a Google account set up, you’ll need to create one before you get started on YouTube. To do this, simply follow the below steps:

  1. Head to YouTube.com
  2. Click ‘Sign In’
  3. Now, choose the option to create a Google account
  4. Follow the steps to create your Google account

Now, you’re all set up with a Google account and can follow the above steps to create a YouTube channel.

How to create YouTube channel art

YouTube channel art is essentially YouTube’s version of the Facebook cover photo. Channel art features in a prominent place on your YouTube channel, which means it’s absolutely vital for any YouTube channel to use customized art to share your personality or more about your brand with your audience.

Here’s an example of Gary Vaynerchuk’s YouTube channel art:

gary-v-youtube

Gary is well-known for his public speaking at conferences and for sharing all he knows about marketing and building businesses with his audience. This is reflected in his cover photo, which displays Gary in mid-flow giving a presentation at what seems to be a large event. The inclusion of his handle @garyvee helps users to identify him on other social chanels and his signature branding makes the art feel personal.

Here’s what you need to know to create striking YouTube channel art…

The perfect sizes for YouTube channel art

The best place to start with your channel art is with the optimal image size that works across multiple devices. For the best results, YouTube recommends uploading a single 2560 x 1440 pixel image.

  • Minimum width: 2048 X 1152 px. This is the “safe area”, where text and logos are guaranteed not to be cut off when displayed on different devices.
  • Maximum width: 2560 X 423 px. This means that the “safe area” is always visible; the areas to each side of the channel art are visible depending on the viewer’s browser size.
  • File size: 4MB or smaller recommended.

YouTube also supplies a Channel Art Template in both PNG and PSD formats to help your figure out the perfect layout for your channel are and how it’ll look across platforms:

channel-art-template-fireworks

Here’s an example of how I used this template to create some channel art for the Buffer YouTube account:

buffer-youtube-channel-art
channel-art

And here’s how it looks across various platforms:

2 top tips for YouTube channel art

1. Ensure any text and logos are within the safe area

The text and logo safe area is the 1546 x 423 pixel space at the center of the YouTube channel art template. This is the area that will be displayed on YouTube when your channel is viewed on desktop screens.

Be careful to ensure any important information such as branding, text, taglines, and key images are within this space so that it’s always displayed as part of your channel art across every device.

2. Consider your channel links

YouTube enables you to add links to your channel and these are displayed in the bottom right corner of your channel art. For example, check the bottom right of the channel art below:

channel-links

When creating your channel art, it’s important to think about the space these links take up and ensure you don’t have anything important (such as logos) occupying that space within your design.

How to add art to your YouTube channel

If you’re just setting up your YouTube channel, you’ll notice the channel art space is blank with a clear call to action to add your art:

blank-channel-art

Once you’ve clicked this link, you’ll see a popup window that gives you the option to upload your own custom channel art. If you’d like to, you can also choose to use one of YouTube’s templates from the “Gallery” or choose to upload one of your photos from Google+.

upload-channel-art

Adjusting the crop

Once you’ve uploaded your channel art, YouTube allows you to adjust the cropping of your image so that you can ensure it’s all lined up correctly.

This crop screen is very handy for checking how your design will look on various platforms. The clear section in the middle of the grid shows you the content that will be displayed on mobile and desktop and the rest of the image shows the image that will be displayed on TVs.

art-adjust-crop

Once you’re happy with the way your cover art looks, click “Select” and your channel art will be added to your channel and saved.

Changing your current channel art

If you already have some channel art in place and would like to update it, head over to your channel homepage. From here, move your mouse over your cover art and you’ll notice a little edit button appear in the top right-hand corner:

5 ways to enhance your channel

1. Optimize your description

YouTube gives you a space on your channel to write a little about your brand and the content you share on YouTube. The description is limited to 1,000 characters, so you have a little room to be creative here.

The copy in your channel description won’t just appear on your channel page. It’s indexed by search engines and can also be featured across YouTube in suggested channel categories. A good tactic is to include some relevant keywords and CTAs within the opening lines of your description.

2. Add links to your channel

channel-links

We briefly mentioned channel links earlier in this post and I’d love to share with you how to add these links in 4 super-quick steps:

1. The first step is to head to your channel homepage and click on the ‘cog’ icon next to your subscriber count:

settings-icon

2. Next, you’ll see a Channel Settings lightbox appear. Here you need to toggle on the option labeled “Customize the layout of your channel”:

channel-options

3. Now that you’ve enabled customizations on your channel, pop back to your channel homepage and you’ll now see the option to “Edit Links” under the settings menu on your cover art:

4. Click the “Edit Links” option and you’ll then be taken to the “About” section of your channel. Here you’ll have the option to add links and choose how many are displayed over your cover art:

edit-links

3. Add a channel trailer

As soon as visitors land on your channel, you want to give them a picture of the type of content your channel covers and why they’ll want to subscribe and check out your videos. A channel trailer is the perfect way to do this.

A short, to-the-point channel trailer can be a great way to introduce people to your content. A channel trailer should grab attention as soon as it starts and also represent the type of content you create on YouTube.

It’s also important to think about the description you add to this video as it features prominently on your channel homepage.

(These trailers only appear for people who are not yet subscribed to your channel.)

4. Add your contact details (email address)

If you’re using YouTube as a business or a creator, it can be great to have your contact details on hand for anyone who is interested in your work. YouTube has a section on each channel profile for you to list your contact details for business inquiries.

This can be found under the “About” section of your channel. To find it, go to your channel homepage, click “About” from the navigation and then scroll down to “Details.” Here you’ll see the option to share your email address:

email-address

Over to you

Thanks for reading. It’s been great fun to dive into how to create a YouTube channel and I hope you picked up one or two tips from this post. If you create a YouTube channel of your own or already have one up and running, I’d love to hear from you and learn from your experience in the comments below.

What is a Brand Account on YouTube?

The YouTube brand account is an option that gives your business or brand a YouTube presence of its own. It is a separate account from your personal one that uses your company or brand’s name, though it is still accessed through your personal YouTube account.

However, this connection between your brand account and your personal account is private, and will not be shown to viewers so there’s no risk of confusion there. You can manage the account by yourself or share the management duties with others in your team who you designate to help with account management.

The ability to add channel managers is one of the awesome features that differentiate a brand account from a personal account. This will be crucial to your brand as your company or agency grows. Even better, you can add managers to your branded channel without having to share your Google password.

What is the difference between a brand and a YouTube account?

What makes a YouTube Brand account different? The difference of having a standard YouTube channel and having a YouTube Brand Account is that with the latter you have the option to change owners and managers while a YouTube channel is always associated with a specific person and their email address.

YOUTUBE BRAND CHANNEL

Your channel brand is the set of unique characteristics that separates your channel from the rest and communicates your key messages and content strategy. It’s a good idea to make your branding: clear and representative so that people who find your channel will instantly understand what your videos are all about.

How to Set Up a Brand Account on YouTube

To access a brand account, you need to first log in to YouTube using your personal credentials. If you don’t have a Google or YouTube account, then you need to sign up for a new Google account. Go to the Google Account setup screen and follow the directions.

Once you’re logged in, click on your image or avatar in the upper right corner of the YouTube screen and click on ‘Settings’. Click ‘Create a new channel’ in the settings screen that opens. Enter a name for your new YouTube business account and click ‘Create’ to start using YouTube under the new company name immediately.

When selecting a brand name…

  • Remember that this account is going to reflect your business. Use a name that does just that. Don’t pick a random name or use your email account username.
  • Make sure the name is short and memorable. Avoid numbers or strange words that make it less clear that this is a business account.

How to Add Managers to New Account

Brand accounts can be a huge asset to your company because you can add owners and managers to the account where you wouldn’t be able to with a personal account. As the owner of the channel, you can add and remove managers, remove listings, edit the business information, manage all the videos, and respond to reviews. Managers that you give access to can also do all those things, except add and remove managers and remove listings.

Individuals classified as communication managers can only respond to reviews and do a few other lesser managerial duties. Having multiple team members responsible for the channel will you manage your channel more easily and improve your workflow processes.

To add managers and owners to your brand account…

  • Sign in to YouTube with the personal account you used to create the brand account
  • Click your image or avatar at the top right corner of the YouTube screen and then choose the brand account’ or channel from the list
  • Click your image or avatar again and click the settings gear icon to open the channel’s account settings
  • Click ‘Add or remove managers’ from the ‘Managers’ area
  • Click the ‘Manage Permissions’ button
  • Choose the invite new users icon at the top right of the ‘Manage permission’ page

Benefits of a Branded Account

Not only will a branded account help you manage your channel more smoothly, it also gives you the peace of mind of being able to allow your team managers access to the channel without having to share your Google password.

Being able to add managers to your account will be crucial for when your brand starts to grow and you have to add new team members to help with tasks like uploading videos, adding thumbnails, writing descriptions, etc so that you can shift your focus to tasks where your expertise is essential.

Keep in mind that your login and password is connected to all of your Google Accounts. This links to your Gmail, your Google Docs, Google Sheets, etc. As a business owner, for security reasons, you never want to give out access to all of the above.

Setting up a brand account for your YouTube channel will be a great way to help your brand’s online presence grow. You won’t have to worry about sharing your personal log in information or having any hold-ups in terms of workflow when it comes to uploads and other channel management issues. As you scale out your business, these features will become incredibly helpful to you and your business

How to Monetize Your YouTube Channel 

The are four golden rules to making money on YouTube, and they are:

  1. You need to have 1,000 subscribers on your YouTube channel
  2. Your videos have generated 4,000 Watch Time hours over the last 12 months
  3. You comply with all YouTube’s policies and guidelines
  4. You have an AdSense account set up

#1 The YouTube Partner Program Requirements

Commonly known as the YouTube Partner Program, or YPP for short, you’ll need to hit all four requirements before your channel will be accepted.

Let’s start with the 1,000 subscribers. This one is pretty straightforward, it doesn’t matter how long it takes you to get to 1,000 subscribers, once you hit that milestone, you’ve reached that requirement.

As well as 1,000 subscribers, you also need 4,000 hours of Watch Time on your videos over the last 12 months. There is some confusion with this one, so let me try and clarify that. First of all, this is not about how much video content you, the YouTube creator watch. This is all about how much video content is watched on your channel from people all across the world. It’s all those hours of video that people have watched on your channel in the last 12 months 

ENABLING MONETIZATION

  1. Select your account icon in the top right corner.
  2. Click Creator Studio.
  3. In the left menu, select Channel > Status and features.
  4. Click Enable in the Monetization section.
  5. Follow the on-screen steps to accept YouTube’s Terms.

HOW TO CREATE A WEBSITE

Whether you want to create a website for yourself or for your business, you can easily do that by using the right tools and resources.

This step-by-step guide will help you create a website from scratch without having to spend money for freelancers, agencies or website builders.

All you need is 3 to 5 hours of your free time to set up a website.

Things you need in order to build a website

  • Domain name (your custom web address, http://www.YourSite.com)
  • Website hosting (service that hosts your website)
  • WordPress (free, commonly used website platform)

To build a fully functional website, you’ll need to secure a domain name (web address) and a web hosting account. These two make sure that your website is fully accessible to others. Without one or another, you will be unable to set up a website.

Once you have domain and hosting, you can create a WordPress website. WordPress is the most popular website building platform that is being used by 30% of all the websites on the Internet.

Setting up a WordPress site is usually a simple, one-click process through your web hosting service.

Once you’ve finished the guide, you’ll have a fully working website online, on a custom domain name and fully accessible by others.

Ready? Let’s get started…


CHOOSING A DOMAIN NAME

  1. Choose a domain name
  2. Register a domain and sign up with web hosting
  3. Set up a website using WordPress (through web host)
  4. Customize your website design and structure
  5. Add important pages and content
  6. Set up a navigation menu
  7. Add an online store (optional) If your selling products online

The domain name is your website name and address. That address is used by visitors when they try to find your site through their web browsers.

If you haven’t registered or chosen a domain name for your website, here are some tips to help you out:

  • If you’re making a website for a business, your domain name should match your company name. For example: YourCompanyName.com
  • If you’re planning to set up a personal website for yourself then YourName.com can be a great option.
  • Use a “generic” domain name extension such as .com.net or .org if your goal is international visitors. Use a “local” domain name extension such as .de.fr, or .ru if your goal is country-targeted visitors.

Don’t worry if your preferred domain name is already taken. There are more than 300 million different domain names registered, but there are a billion other possibilities that are still available. If your dont have a domain name you can get one from BLUEHOST , GoDADDY.

HOSTING

Whichever web hosting company you sign up with, make sure it has the following features:

  • FREE domain name with SSL (for security)
  • One-click-install for WordPress (free)
  • Custom email accounts
  • Unlimited or unmetered bandwidth (no traffic limitations)
  • Customer support, preferably 24/7 live chats

SSL Certificates are small data files that digitally bind a cryptographic key to an organization’s details. When installed on a web server, it activates the padlock and the https protocol and allows secure connections from a web server to a browser

We recommend using Bluehost.com for web hosting and domains. They offer free domain registration for the first year and getting a domain name and hosting from the same company saves you some time and money.

1) To get a web hosting account, simply visit Bluehost and click on “Get Started Now”.

Bluehost

2) Next, choose your web hosting plan (choice plus is fully unlimited, while basic is best for new sites):

choose web hosting plan

3) Next, choose and register a domain name (free for the first year):

register a domain name

Set Up WordPress Website (Through Web Host)


Once you have your domain name and web hosting ready to go, you’ll need to choose and install a website building platform (also known as CMS).

We recommend choosing WordPress since it’s easy to use and comes with thousands of free designs and add-ons that make your website look professional and unique.

Setting up your WordPress website is easy, and your web host mostly does it for you, so you don’t really have to get your hands too dirty.

If you don’t use Bluehost as a web hosting, don’t worry. Many web hosting providers have “WordPress install” located somewhere in the hosting cPanel. If you are dealing with a web host that doesn’t provide “one click installs“, try setting up WordPress manually.

1) Installing WordPress website on Bluehost

  1. Log in to your Bluehost account
  2. Click on “My Sites” and then on “Create Site”Bluehost My Sites screen when learning how to create a website
  3. Provide some basic information about your site, and the WordPress installation will start. It will all happen on autopilot.
  4. When the setup is done, Bluehost will show you the installation and login details. Be sure to save this information somewhere safe.
Bluehost Installation Details

2) Test your website by typing in your domain address

With WordPress installed, what you should do next is test if everything works.

The easiest way to do that is to type in your domain name into the web browser.

With WordPress correctly installed, the thing you’ll see is a very basic website like this:

How to create a website: Fresh WordPress Install

If this doesn’t look too attractive, don’t worry, you’ll soon learn how to change the design to something more appealing.

3) Verify SSL/HTTPS settings

In short, an SSL certificate makes sure that your website is delivered to your visitors securely.

Bluehost automatically adds an SSL when you create a new website or install WordPress. To check your site’s SSL status, do these steps:

  1. Log in to your Bluehost portal
  2. Click on “My Sites”
  3. Find your site and click on “Manage Site”
  4. Go to the “Security” tab
  5. Under “Security Certificate,” you will find your “Free SSL Certificate” status

If everything went well, you should see a lock icon next to your domain name in the web browser.

It may take a few hours before the SSL is set up completely, but that shouldn’t stop you from continuing to build your website.

Step #4: Customize Your Website Design and Structure


With your bare website alive and kicking, it’s now time to make it feel more like your own by picking a nice design, customizing it, and adding branding elements.

Starting with:

1) Choose a theme for your website

WordPress themes are out-the-box design packages that change the way your entire website looks like. WordPress themes are interchangeable – you can switch from theme to theme easily.

Most importantly, there are thousands of free and paid WordPress themes available on the web.

popular wordpress themes

If you want to get a free theme – which is where most people like to start – the best place to go is the official theme directory at WordPress.org. Particularly, the section for the most popular themes.

All themes you see there have proven to be of great quality and have large user bases behind them.

You are free to browse through that list and pick any theme you fancy but to speed things up for you in this guide, we recommend Neve. It’s a versatile theme that comes with a handful of starter sites (design packages for different niches and types of websites).

We’re going to use that theme in this guide going forward.

2) Install the theme you like

Go to your WordPress admin interface. You can find it at YOURSITE.com/wp-admin. Use the username and password you got during WordPress installation.

  1. From the sidebar, go to “Themes → Add New.”How to create a website: add themes
  2. In the search box, type in “Neve” and click on the “Install” button next to the theme’s name:How to create a website: install theme
  3. After the installation is done, click on the “Activate” button that will appear in place of the “Install” button.
  4. You’ll see a success message, which lets you know that the installation went as expected.

3) Import a design (only for Neve theme users)

Although the theme is active at this point, there are a couple more things you should do to make it look right.

You’ll see this welcome message:

neve welcome

One of the great things about Neve is that you get not just one design with it, but a whole range of different designs that you can pick from. Click on the big blue button to see them. 

neve sites

There are more than 20 designs available for free, and they cover most of the popular website niches, like business, restaurant, fitness, music, food, wedding, photography, eCommerce, portfolio, and more. Basically, no matter what the topic of your site might be, you’ll find a design package that fits. 

For the purpose of this guide, we’ll pick the first one on the list – called “Original.”

You’ll notice that this installation process takes care of all the elements you’ll need on your site – you get the design itself, all the plugins required to make it work, and also demo content that you can later modify.

Click on the “Import” button to get everything going. After a minute or so, you’ll see the success message.

neve success
neve getting started

Next, go to “Appearance → Neve Options” to see what else you can do with the theme.

We’re going to explore some of these options below:

4) Add a logo

The first thing that most users want to do is upload their logo and have it displayed in the top left corner of the site. Let’s do that now.

💡 You can DIY a logo. Here are some of the tools you can use to create a logo yourself.

Once you have a logo ready, you can add it to your site. Go to “Appearance → Neve Options” and click on the link labeled “Upload Logo.”

How to create a website: upload logo

Here’s what you’ll see:

customizer logo

This interface is called the WordPress Customizer, and it allows you to edit various aspects of your website’s appearance. For starters, you can upload your logo. To do that, click on the “Select Logo” button that’s near the top left corner.

WordPress will give you an option to crop the logo, but you can skip that.

logo added

You should see your logo in the corner of the page shortly.

Additionally, you can choose if you want to display the site name and tagline alongside the logo, and set the max-width of the logo. Experiment with these settings and pick what works best for you.

Click on the “Publish” button when done (the top left corner), and then click on the “X” button to exit the Customizer.

5) Change website color scheme and fonts

Another thing you can experiment with is changing the color schemes and fonts used on the site. As you’re learning how to create a website, this is an easy fix to make your site more unique and more in tune with your brand identity.

  1. To begin, go to “Appearance → Neve Options” again. We’re going to focus on the following two options:How to create a website: change colors and fonts
  2. First, click on “Set Colors.”
  3. Most WordPress themes are defined by the color scheme they use for various elements of the design.
  4. Most commonly, those are colors of the links, texts on the site, and backgrounds.
  5. You can change the color assignments for the Neve theme via the Customizer.
  6. To switch any of the colors, just click on it and pick a new color.change colors
  7. Click on “Publish” and “X” when you’re done.

Changing fonts works similarly:

  1. Click on the “Customize Fonts” link in the “Appearance → Neve Options” panel.
  2. Neve lets you pick from a whole catalog of system fonts and Google Fonts.
  3. Just click on the “Font Family” box and select the font you like.change fonts
  4. After that, you can fine-tune the individual fonts used for your headings.

Experiment with these settings to see the effect they have on your site.

  1. To customize the font used for the body section of your site, click on the arrow button near the top left.go back customizer
  2. Click on “General.” This will take you to a similar options panel, but this time you’re adjusting the main body font.
  3. Click on “Publish” and “X” when done.

6) Add a sidebar

Another thing you can do in the “Appearance → Neve Options” panel is set how you’d like your sidebar to look. Click on “Content / Sidebar” to begin.

You have three main options here: no sidebarsidebar to the left, or sidebar to the right. Sidebar to the right is the classic layout for most websites. You can also set the content width. After doing your changes, click on “Publish” and “X.”

7) Add widgets (free WordPress add-ons)

Widgets are those small content blocks that usually appear in websites’ sidebars. Since we’ve just set the sidebar in the previous step, let’s now customize it with widgets.

To configure widgets, go to “Appearance → Widgets.” You’ll see this: 

How to create a website: customizer

On the left, you can see all the widgets available; and on the right, there are all the widget areas supported by your current theme. To add a widget to the sidebar, all you need to do is grab the widget from the left and drag and drop it onto the sidebar area.

For example, if you want to list all your pages in the sidebar, grab the “Pages” widget and drag it onto the sidebar section. You can also configure some basic settings of the widget.

8) Experiment with the theme you built

What we’ve covered above will be enough for you to figure out how to create a website that stands out and looks original, but there are many more options available.

To see them all, go to “Appearance → Customize.” This will fire up the main interface of the Customizer with all its settings and presets.

How to create a website: customizer

We encourage you to browse through what’s available there and play around with some of the options. You’ll likely stumble upon some customizations we haven’t discussed here.

Step #5: Add Content/Pages to Your Website


Pages are the essence of your website. It’s hard to imagine a website without any pages on it, right?

From a technical point of view, a web page is just a document on the web. It’s not very different from your traditional Word document apart from it having your website’s branding elements such as the header and footer.

Web pages are easy to create in WordPress. But before we get into the how-to, let’s discuss what pages you should create in the first place.

Most websites will find the following pages essential:

  • Homepage – it’s the first page that your visitors see when they go to your website
  • About page – a page explaining what your website is about
  • Contact page – a page letting visitors contact you
  • Blog page – a listing of your most recent blog posts; if you’re not planning on blogging, you can use the blog page as a place for your company news and announcements
  • Services page – if the website you’re building is for a business, use this page to showcase your services
  • Shop page – for companies that want to launch an eCommerce store

Many of the pages above will be very similar in structure – the only difference being the content on the actual page. Basically, once you learn how to create one page, you’ll know how to create them all. With that, there is some nuance here, so let’s now cover how to create a couple of basic types of pages:

1) Creating a homepage

If you’re using Neve, your homepage looks something like this:

homepage

You can edit the structure of this page as well as the elements on it (all texts and images).

To do that, just click on the “Edit with Elementor” button in the top bar. 

edit with Elementor

What you’ll see is the interface of the Elementor page builder.

How to create a website: Elementor

Elementor is what we call a visual page builder. This means that you can click any element that you see on the page and edit it directly. For example, if you want to change the main headline, just click on it and start typing. 

headline type

If you take a look at the left sidebar, there’s a whole customization panel there. You can adjust the structure and the styling of any content block. For example, here’s what you can see when working on the headline: 

headline style

Another cool thing is that you can grab onto any element on the page, and drag-and-drop it somewhere else.

Elementor blocks

To add new elements, click on the small square icon in the top left corner.

You’ll see a list of all the content blocks available.

Grab any of the blocks and drag it onto the page’s canvas.

The best way to work on your homepage is to go block by block and edit the demo content that’s on the page.

Type in new text content, realign some of the blocks, delete the ones you don’t need, and add new ones accordingly.

This whole interface is quite intuitive to use, so just spend an hour or so using it and experimenting with different things.

2) Create pages such as “About”, “Services”, “Contact”

Creating classic web pages is even easier to do in WordPress than working on your homepage. Go into “Pages → Add New.” You’ll see this interface:

How to create a website: add page

Every page needs a title, so start by adding one where it says “Add a title.” For example, “About Us” or “Contact.”

Next, pick a page layout. If you’re creating a standard page, you can go with the first one on the list – “Single Row.” But to speed things up, you can choose from the template library. For that, click on the blue button.

You’ll see a window letting you pick from a range of pre-made page sections. If you’re working on your about page, for example, you can quickly find and use the following blocks:

about page blocks

Just click on the “Insert” button next to the block you like, and it will be added to the page. From there, you can further customize it, change the texts, or replace images.

about page edit

When you’re done, click on the “Publish” button in the top right corner of the screen.

You can follow the same process when working on your contact page or services page as well.

Just pick different page blocks from the template library. For example, these should work great on a services page:

services blocks

If you want to add new page elements by hand – instead of using the templates – click on the “+” icon that’s in the top left corner of the editor interface. 

add block

Any block you select there will be added at the bottom of your page. Here’s what a new paragraph block looks like:

orders

As you can see, you can edit it freely, change the properties of the text, plus there are color settings in the right sidebar.

As always, remember to click on “Publish” when you’re done.

3) Create a blog page

The blog page is where the listing of your most recent blog posts can be found.

The good news is that the blog page has already been created for you. This happened when you installed WordPress and the Neve theme. You can see that page by going to “Pages”: 

blog page listing

Click on the “View” link to see your blog page in action.

Adding new blog posts:

To add new blog posts, simply go to Go to “Posts → Add New.”

add post

Does this interface remind you of anything? Yes, this is the same editing environment that we used when creating standard pages. Easy!


With a range of good-looking pages created, the next step in our quest to how to create a website is to set up your navigation (a website menu). The menu is what your visitors will use to go from page to page on your site.

Go to “Appearance → Menus,” and from there, click on “create a new menu.”

How to create a website: create menu

Here’s how to create your first menu step by step:

WordPress Menu Creation Process
  1. Start by adding a title. The menu title doesn’t really matter, but it helps to recognize your menu among other menus (yes, you can have more than one).
  2. Select the pages to be added to your menu. You can also add other items to the menu – like posts or custom links.
  3. Click on the “Add to Menu” button to add the selected pages to your menu.
  4. Drag-and-drop menu items to arrange the links in order of importance.
  5. Select a menu display location. This differs from theme to theme, in this case, set your menu to the “Primary” location will display the menu in the header.
  6. Lastly, save your menu.

At this stage, you’ll see your menu on the homepage in all its glory.

Step #7: Add an Online Store/eCommerce


The last thing we’ll do in this guide is to build ourselves an online store.

If you wish to add an online store to your newly created website, follow this step-by-step tutorial here.

This is obviously not something that all websites need, so feel free to skip this step if eCommerce isn’t something you want to get yourself into.

How WordPress eCommerce works

With WordPress being such a versatile website platform, it’s no surprise that it can let you build a fully functional eCommerce online store. By fully functional, we mean that you can list any number of products, make them available for sale, and then also collect orders from customers and even handle all tax- and shipping-related elements of the whole process.

This is all done with a plugin called WooCommerce.

WooCommerce is the most popular, most functional, and frankly the best eCommerce solution for WordPress.

💡 We have a whole separate guide on how to get WooCommerce running on your WordPress website. We invite you to hop over there and read a detailed installation how-toFollow Steps 3 and 4 and then come back here.

… Okay, so with WooCommerce installed on your site and products added in your catalog, you’ll notice that, in the process, new pages have been created by WooCommerce automatically. Those pages are:

  • “Cart” – your store’s shopping cart
  • “Checkout” – the checkout page where customers can complete their purchases
  • “My account” – each customer’s profile; holds past orders, current details, and other personal information; the customer can always edit their info
  • “Shop” / “Products” – the main shop page – the one where your products are listed

Each of these pages serves a specific purpose for your store and its functionality. The good news is that most themes these days are optimized to make those pages look right. The Neve theme is no different. If you visit any of these new pages, you’ll see that the presentation is clear and everything is easy to grasp. Here’s an example of the shopping cart page:

cart

Apart from that, all these pages work like any other page on your WordPress website. This means that you can edit them, add your own elements, or change things like colors, layouts, etc. But when you’re doing this, be careful not to erase the WooCommerce shortcodes that are already there.

You’ll also notice a new cart icon on the main menu of your site.

At this stage, your eCommerce store is fully operational. This means that your customers can come in and do their shopping. You’ll see their orders in the WordPress admin area under “WooCommerce → Orders.” 

orders

Congratulations – You’re Ready to Launch!

To quickly summarise the steps you’ve learned:

Table of Contents

  1. Get web hosting and register a domain:
    Choosing a Domain Name
    Choosing a Website Hosting
  2. Set up your website through web host:
    Installing WordPress
  3. Designing your website:
    Finding a Theme
    Installing a Theme
    Customization and Tweaks
  4. Finish by adding content (pages):
    Adding and Editing Pages
    Setting Up Navigation Menu

Last but not least – keep improving your website!

Congrats, you’ve just figured out how to create a website all on your own!.

Design a site like this with WordPress.com
Get started